Immich
-
You can support more guides like this

- Version 1.00
- Create Date June 2, 2025
- Last Updated June 8, 2025
- Download 903
- File Count 2
- Installation Support Ask Support

| File | |
|---|---|
| immich.env | |
| immich.yml |
Self-hosted photo and video management solution
About: Immich
In this tutorial, i will show you how to install Immich using Docker Manager on your TerraMaster NAS.
Immich easily back up, organize, and manage your photos on your own server. Immich helps youbrowse, search and organize your photos and videos with ease, without sacrificing your privacy.
Immich require:
- RAM: Minimum 4GB, recommended 6GB.
- CPU: Minimum 2 cores, recommended 4 cores.
Download from above the immich.yml and immich.env files and save them locally on your computer.
If you already have Docker Engine and Docker Manager apps installed, proceed to next step.
If not, follow this guide to install them: How to install Docker Engine and Docker Manager.
If you already have these 2 shared folders, proceed to next step.
If not, follow this guide to create the folders: How to create DockerYAML and DockerAppsData shared folders
For TOS5 and TOS6, we are going to run these containers as the superuser account (the account that was created during initial NAS setup).
For TOS4, we are going to run these containers as the root account.
If you already know your username id and group id from a previous container deployment, proceed to next step.
If not, for TOS6, the username id and group id for the superuser account should be both 0.
You can double check this by by running a command in terminal.
You can simple install the ttyd app and find your uid and gid following this guide: How to install and use ttyd app (share your terminal over web).
You can also use putty or any other SSH client and type id command. In this case, ssh service must run on your NAS.
For TOS6, you can use the builtin terminal app How to use in built Terminal on TOS6
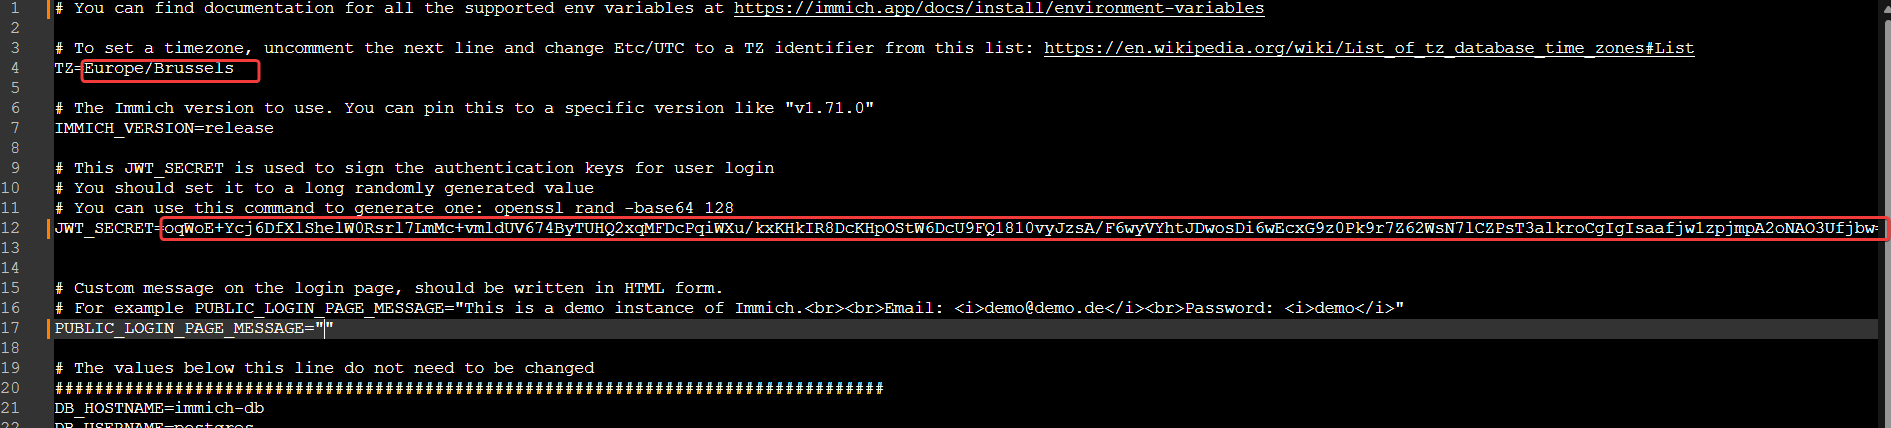
Find your current time zone on this website, as example for Brussels is:
TZ=Europe/Brussels
It is recommended to replace the JWT_SECRET variable in the immich.env file with your own generated key.
To generate a new key, you can use the online tool here or you can use openssl directly on your NAS via terminal.
To connect to the terminal, you can simple install the ttyd using this guide: How to install and use ttyd app (share your terminal over web). You can also use putty or any other SSH client but in this case, ssh service must run on your NAS (TOS ssh service or OkmSSHD). For TOS6, you can use the builtin terminal app How to use in built Terminal on TOS6. Once you are connected to your NAS, run the command below
user@TNAS:~# openssl rand -base64 128
After you run the command, the key will be generated:
user@TNAS:/# openssl rand -base64 128
oqWoE+Ycj6DfXlShelW0Rsrl7LmMc+vmldUV674ByTUHQ2xqMFDcPqiWXu/kxKHk
IR8DcKHpOStW6DcU9FQ1810vyJzsA/F6wyVYhtJDwosDi6wEcxG9z0Pk9r7Z62Ws
N7lCZPsT3alkroCgIgIsaafjw1zpjmpA2oNAO3Ufjbw=
user@TNAS:/#
Now we need to change ths JWT_SECRET variable in the immich.env with your own generated key.
On your computer, open with your preffered text editor the immich.env file downloaded on Step 1.
- Replace the variable of
JWT_SECRETwith your own key, in one line. - Replace the
TZvariable with your own timezone found don Step 5
Save the file and close the text editor.
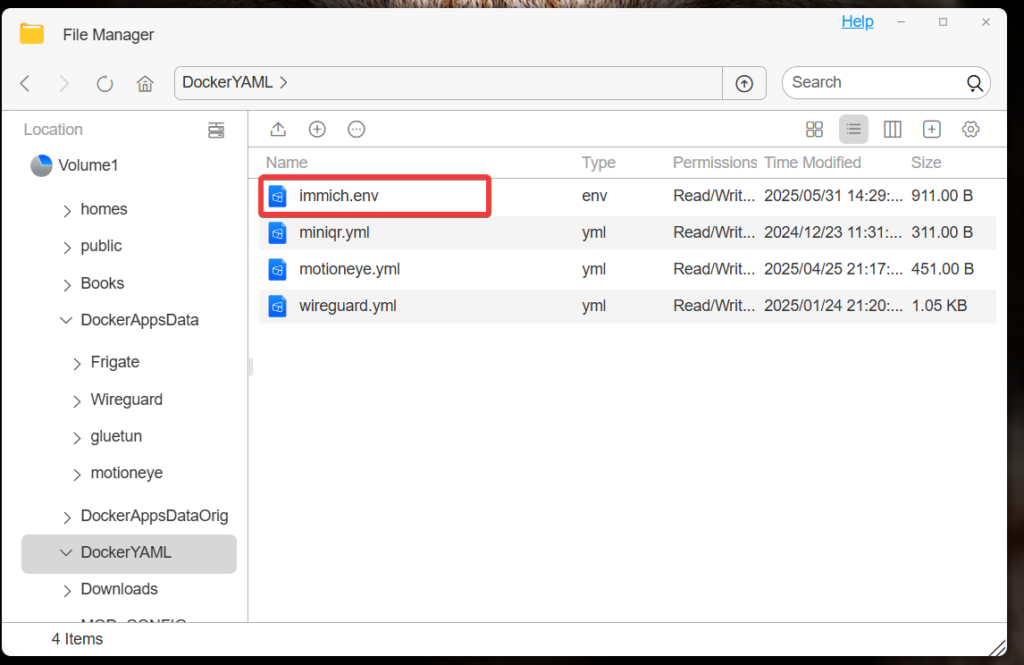
Now we need to upload the edited immich.env file on the NAS
To do so, from your TOS, open the File Manager, navigate to folder DockerYAML, click on the Upload icon
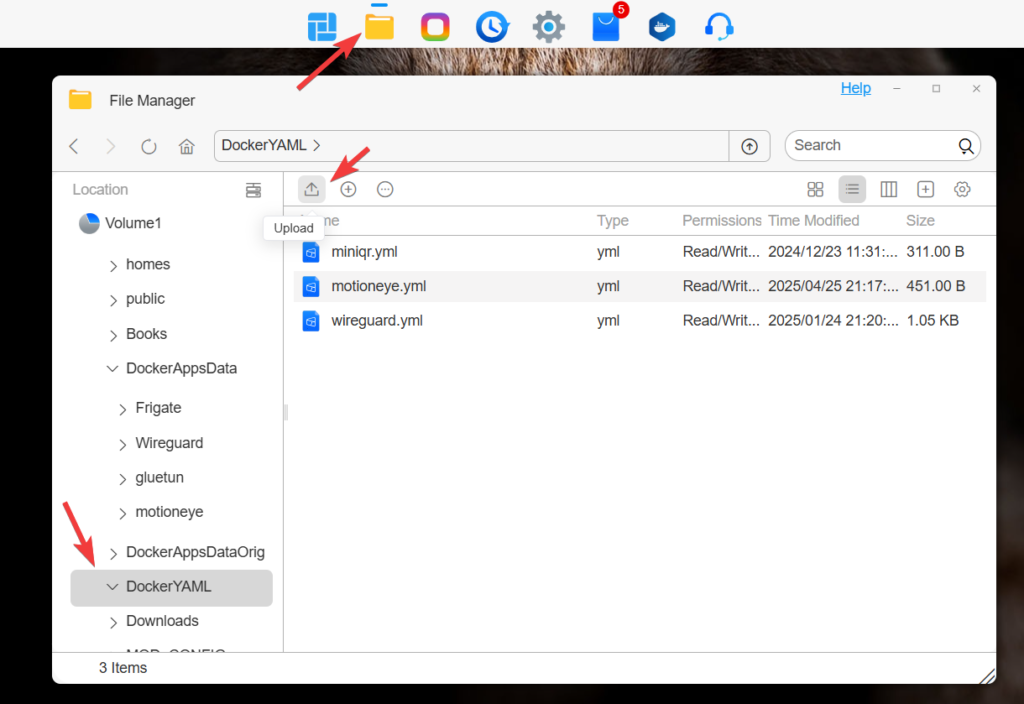
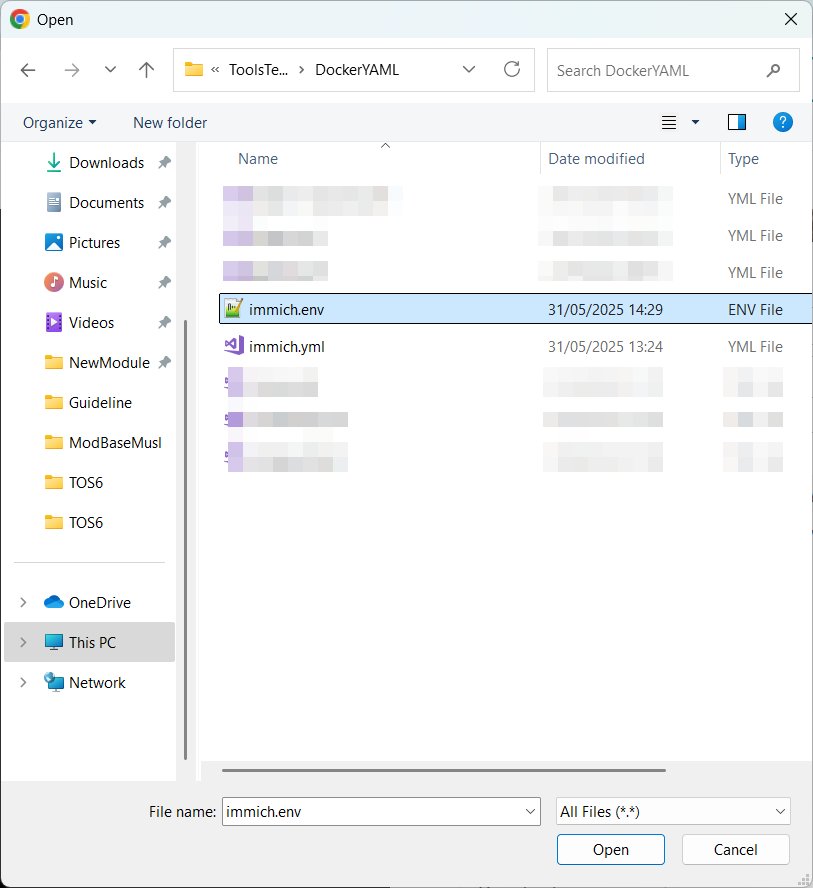
Select the location on your computer where you have the immich.env file,
The file should appear on your NAS as below
Open Docker Manager by using the icon on the desktop or from the top menu.
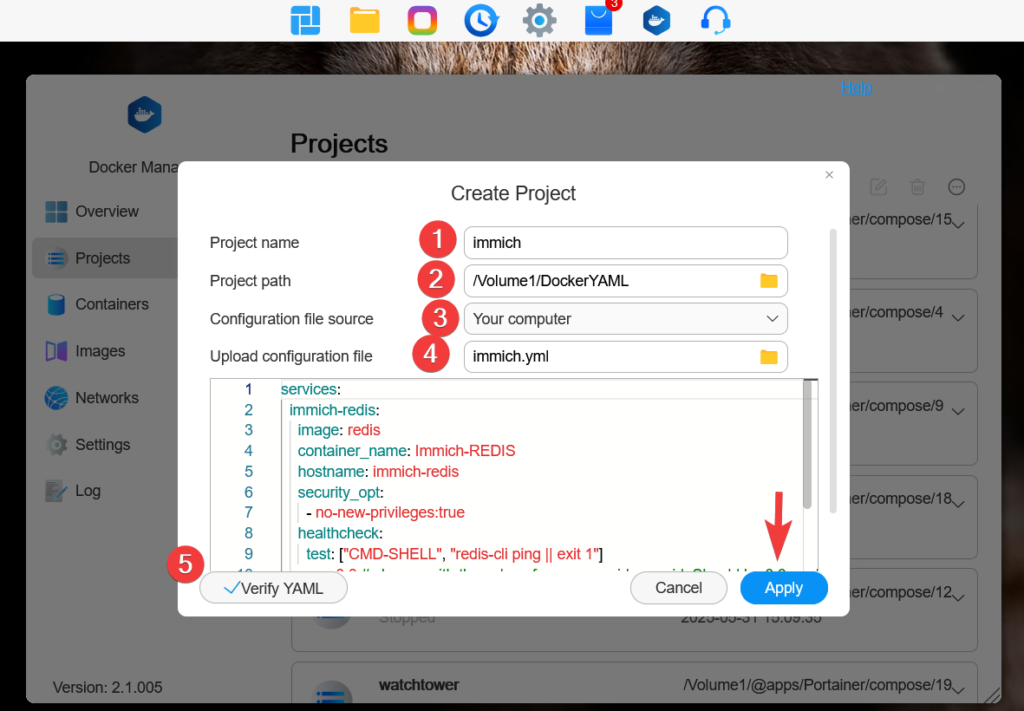
Click on Project from the left menu and then on the small + icon to add new project.

- On the Project name type immich
- On the Project path type /Volume1/DockerYAML or use the Browse button to navigate and select the DockerYAML folder
- Configuration file source select Your computer from the dropdown list
- Click on the folder icon to browse your local computer for yml file
On the file browser window, choose the immich.yml that you downloaded on Step 1.
After you select the file, click on Open.
The file will be loaded and the content will appear on the code section.
Before you proceed further, adapt the code to your particular values for these variables:
userchange to the values 0:0 with the values for your user id and group id found on Step 3.TZchange to the value for your specific zone found on Step 4.
Scroll down in the code window to review the config.
After you adapt all the required values, click on Verify YAML button. If the code is OK, the Apply button will become available.
Click on it to deploy the project.
Config files will be stored at /Volume1/DockerAppsData/immich
The project will start building and will take a few minutes depending of your internet speed and NAS type.
Note that on a NAS with only 2GB of memory, the NAS may get unresposive during the build

If the building went well, our project will show the status as Running.
When the project is selected, the buttons on top will be available from where you can stop/start the project, restart, delete or force stop.

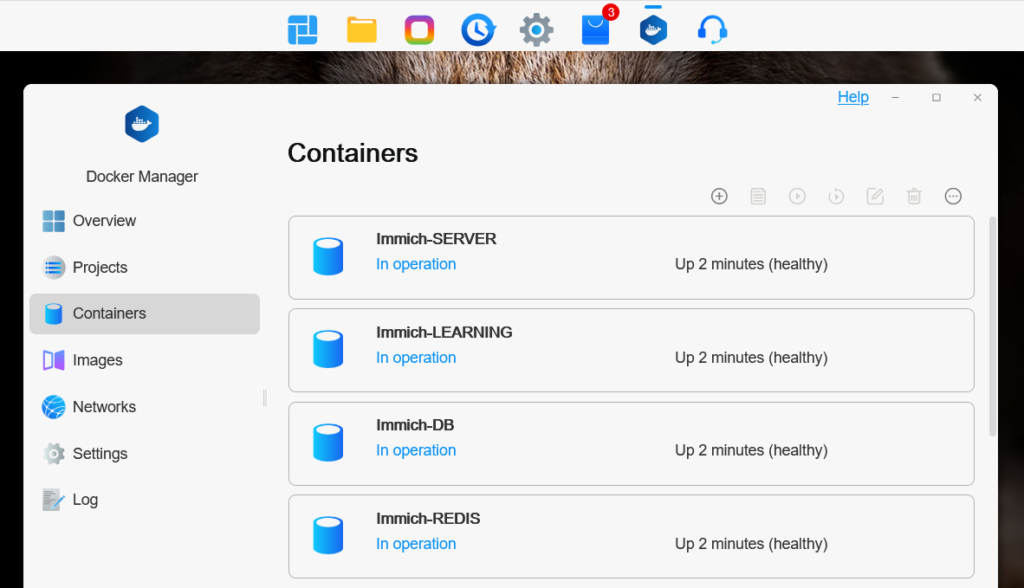
Now go to Container section were you can see some info about the newly created containers.
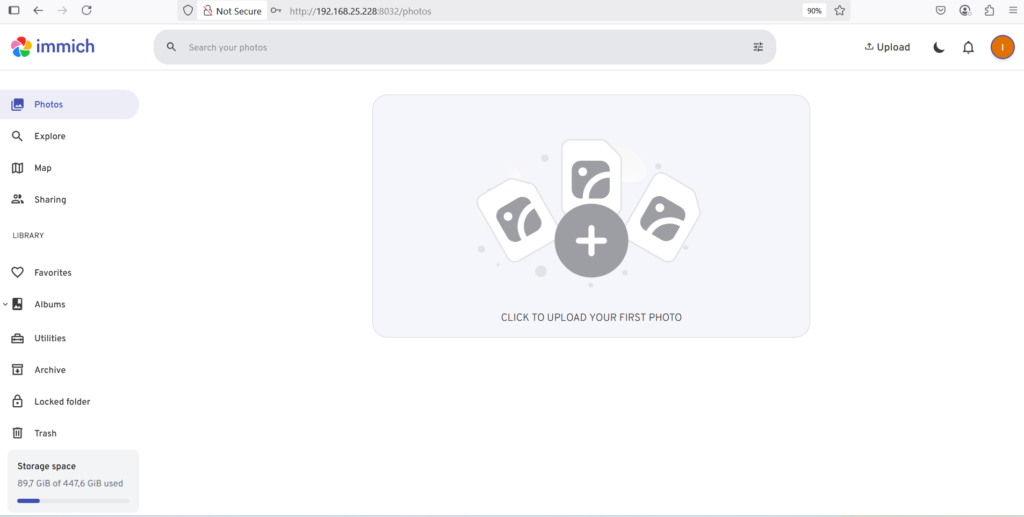
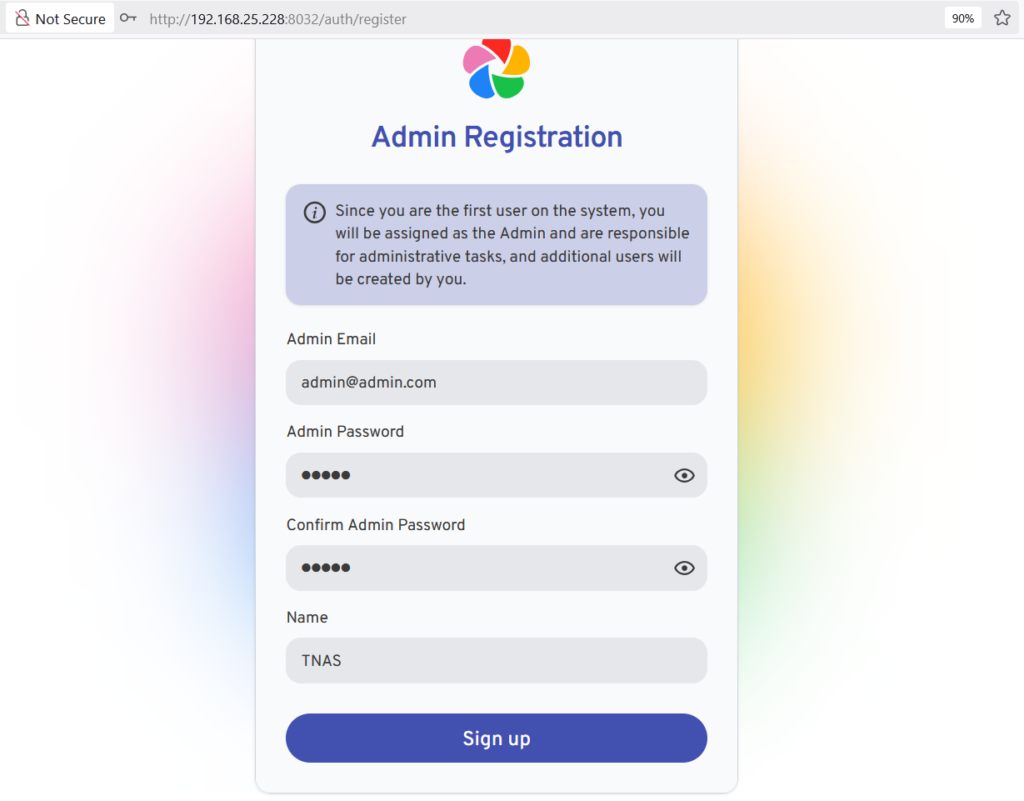
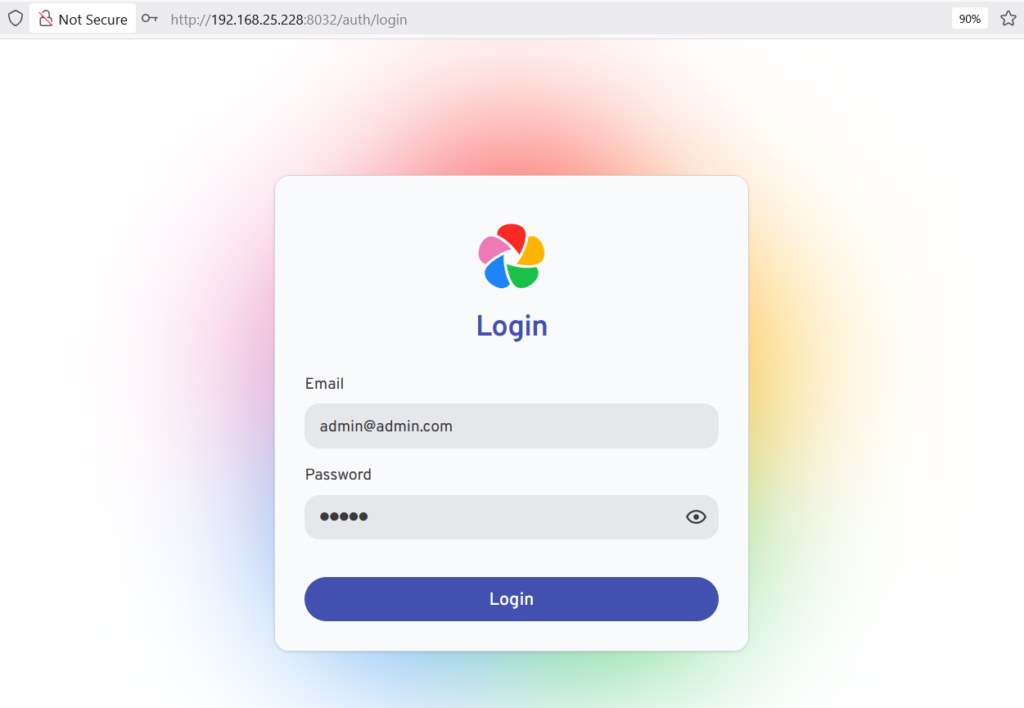
Now navigate in the web browser to http://yournasip:8032 to open Immich WebUI.
Press on Getting Started

Choose you values for the fields below to setup an admin and press on Sign Up
Now loginwith the user created on the step above
On the next steps, choose your setting for dark/light theme, enable Storage template if you want, and click on Done
Now you are ready to upload photos from computer or sync your photos with your mobile